I MOVED!
I have officially made the switch from blogspot to wordpress
Please read this blog at the following linkwww.cuisinequeen3.wordpress.com
Please bear with me as I adjust some of the older posts to fit certain formatting needs!
Thanks!
Wednesday, September 1, 2010
No-Cook Soup
Is it too hot out to cook? Need a nice refreshing dish to cool you off?
Good thing you read this blog, because I have a great recipe for you!
It was pure chance that I stumbled upon this recipe. After being evacuated from work this afternoon (I work right next to Discovery headquarters where a man was holding hostages earlier), I decided to hit the treadmill at my complex for a little bit, and picked up "Real Simple" to read once I decided to walk.
As I was flipping through the magazine, I was intrigued by the bowl of green soup, so I read the recipe and ingredient list and thought to myself,
Ingredients:
3/4 fat-free sour cream
4 scallions, roughly chopped
2 jalapenos, seeded
1/2 C. fresh basil
1 tbsp. fresh lime juice
2 english cucumbers, peeled and roughly chopped
salt and pepper to taste
Steps:
 In blender, puree the sour cream, scallions, jalapenos, basil, lime juice, half the cucumbers, 1/4 C. water, salt and pepper.
Add the remaining cucumbers and puree until smooth - add water as needed to get the right consistency.
Let chill for an hour, squeeze in some more lime juice if you like, and serve!

Tips:
Now how easy was that?
I can't say that this is my favorite recipe ever, but it definitely hit the spot on such a hot day. I guess you will have to make it and try it yourself to see what you think...and if you do, let me know what you think!


In terms of ww* points, the only thing that counts is the sour cream and that is about 5 for the whole recipe (if that), so we will over-guess and say 1 heaping cup of this soup has about 1 point.
Serve this with a nice piece of toasty baguette and you are all set.
Good thing you read this blog, because I have a great recipe for you!
Chilled Cucumber Soup
It was pure chance that I stumbled upon this recipe. After being evacuated from work this afternoon (I work right next to Discovery headquarters where a man was holding hostages earlier), I decided to hit the treadmill at my complex for a little bit, and picked up "Real Simple" to read once I decided to walk.
As I was flipping through the magazine, I was intrigued by the bowl of green soup, so I read the recipe and ingredient list and thought to myself,
"Hey, I have all those ingredients already!"So I ripped out the recipe, ran upstairs to my apartment and made this fabulous, super easy no-cook soup.
Ingredients:
3/4 fat-free sour cream
4 scallions, roughly chopped
2 jalapenos, seeded
1/2 C. fresh basil
1 tbsp. fresh lime juice
2 english cucumbers, peeled and roughly chopped
salt and pepper to taste
Steps:

Add the remaining cucumbers and puree until smooth - add water as needed to get the right consistency.
Let chill for an hour, squeeze in some more lime juice if you like, and serve!

Tips:
Now how easy was that?
I can't say that this is my favorite recipe ever, but it definitely hit the spot on such a hot day. I guess you will have to make it and try it yourself to see what you think...and if you do, let me know what you think!

I wanted to give some tips for cutting jalapenos for you pepper amateurs. In my experience, since the pepper is so small and you hit the seeds as soon as you cut into it, I find it best to make a small incision (I sound like a surgeon) lengthwise down the center of the pepper.
Once you have made the cut, carefully peel parts of the pepper away from the seeds. You will end up with something that looks like this...

Serve this with a nice piece of toasty baguette and you are all set.
Super Fresh!
As fall is approaching, gardens are popping out fresh ingredients left and right. One thing that your garden might be overflowing with is tomatoes! I have a super easy and super fresh recipe for pasta so that you can use up a bunch of those tomatoes for a tasty dinner.
Ingredients:
 4 quarts water
1 tbsp. red wine vinegar
1/2 tsp. kosher salt
1/8 tsp. crushed red pepper
1/4 C. chopped or torn fresh basil leaves
1/4 C. chopped fresh flat-leaf parsley
3/4C.(3 ounces) crumbled goat cheese
Steps:
Preheat oven to 450°
Bring 4 quarts water to a boil in a large pot. Cook 10 minutes or until spaghetti is al dente. Drain spaghetti in a colander over a bowl, reserving 1/2 cup cooking water. Return spaghetti to pan; set aside, and keep warm.
 While spaghetti cooks, combine tomatoes, 1 tablespoon evoo, vinegar, ½ teaspoon salt, and pepper, tossing well to coat. Bake tomato mixture for 10 minutes or until tomatoes are soft and lightly charred in places.
Add tomatoes and any tomato juice to spaghetti in pot. Add 1/4 cup reserved cooking water to baking pan, scraping pan to loosen browned tomato bits; carefully pour water mixture and remaining 2 tablespoons oil into spaghetti mixture.
Place pot over medium heat. Add remaining reserved cooking water, 2 tablespoons at a time, until spaghetti mixture is moist, tossing frequently. Stir in basil and parsley. Sprinkle with cheese. Serve immediately.
 *
*
Pasta with Tomatoes and Goat Cheese
Ingredients:
 4 quarts water
1 tbsp. kosher salt
12 oz. uncooked whole wheat spaghetti
2 pints cherry tomatoes
3 tbsp. evoo1 tbsp. red wine vinegar
1/2 tsp. kosher salt
1/8 tsp. crushed red pepper
1/4 C. chopped or torn fresh basil leaves
1/4 C. chopped fresh flat-leaf parsley
3/4C.(3 ounces) crumbled goat cheese
Steps:
Preheat oven to 450°
Bring 4 quarts water to a boil in a large pot. Cook 10 minutes or until spaghetti is al dente. Drain spaghetti in a colander over a bowl, reserving 1/2 cup cooking water. Return spaghetti to pan; set aside, and keep warm.

Add tomatoes and any tomato juice to spaghetti in pot. Add 1/4 cup reserved cooking water to baking pan, scraping pan to loosen browned tomato bits; carefully pour water mixture and remaining 2 tablespoons oil into spaghetti mixture.
Place pot over medium heat. Add remaining reserved cooking water, 2 tablespoons at a time, until spaghetti mixture is moist, tossing frequently. Stir in basil and parsley. Sprinkle with cheese. Serve immediately.
 *
**Photo: Gentl & Hyers; Styling: Kendra Smoot
Tuesday, August 31, 2010
It's Gumbo, Dumbo!
Gumbo is a great dish that is good for any beginner cook. It is pretty hard to mess up, and you can be a little adventurous with the ingredients because you can put almost ANYTHING in gumbo.
I made a chicken and sausage gumbo that I found on the Cooking Light website while I was browsing. For some reason I have a been in a soup and stew mood, and I came across this in my browsing. I altered it a little bit, so I will post it how I made it and throw some tips down at the end.
Ingredients:
1 bag boil-in-bag rice
2 tbsp. whole wheat flour
1 tbsp. vegetable oil
1 C. chopped onion
1 C. chopped green bell pepper
1 C. chopped celery
1 tsp. bottled minced garlic
1/2 tsp. dried thyme
1/4 tsp. ground red pepper
2 C. chopped roasted skinless, boneless chicken breasts (about 2 breasts)
8 ounces turkey kielbasa, cut into 1-inch pieces
1 (14.5 oz) can diced tomatoes with jalapenos
1 (14.5 oz) can fat-free, low sodium chicken broth
 Steps:

Tips:

I made a chicken and sausage gumbo that I found on the Cooking Light website while I was browsing. For some reason I have a been in a soup and stew mood, and I came across this in my browsing. I altered it a little bit, so I will post it how I made it and throw some tips down at the end.
Chicken Sausage Gumbo
Ingredients:
1 bag boil-in-bag rice
2 tbsp. whole wheat flour
1 tbsp. vegetable oil
1 C. chopped onion
1 C. chopped green bell pepper
1 C. chopped celery
1 tsp. bottled minced garlic
1/2 tsp. dried thyme
1/4 tsp. ground red pepper
2 C. chopped roasted skinless, boneless chicken breasts (about 2 breasts)
8 ounces turkey kielbasa, cut into 1-inch pieces
1 (14.5 oz) can diced tomatoes with jalapenos
1 (14.5 oz) can fat-free, low sodium chicken broth
 Steps:
Bring water to a boil. Submerge bag of rice and cook for 10 minutes. When done, remove from heat and set aside.
While rice cooks, combine flour and oil in a large sauce pan. Saute over medium-high heat 3 minutes.
Add onion, pepper, celery, garlic, thyme and red pepper; cook 3 minutes or until tender, stirring frequently.

Stir in chicken, kielbasa, tomatoes, and broth; cook 6 minutes or until thoroughly heated. Serve over rice.

I used diced tomatoes with jalapenos because I like the spice, but the original recipe called for diced tomatoes with peppers and onions.
I used a reduced-fat, skinless, turkey sausage that was good, but may have been a little too sweet for this recipe.
I also chose not to serve mine over rice (I overdid it a little this weekend), but it taste fabulous without it anyways - I guess it is personal preference.
As far as weight watchers points*, I don't think it is that much. All the veggies have nothing, the chicken is about 6 total in the whole recipe, the sausage that I used was very low in fat so i will say another 6 points for that. Add in a point for flour, oil and 2 for the tomatoes - that brings the whole thing to about 16. I'll call a serving a 1 1/2 cups, 4 servings/recipe, so...after all that math - 4 points for 1 1/2 cups of delicious, fabulous, spicy gumbo sans rice).

Monday, August 30, 2010
Pork Butt and Cupcakes and Birthday - OH MY!


Jeff cooked the main course of the day - pork butt! I did learn that it is not actually pork butt, but (hahaha) pork shoulder! The reason it is called pork butt is because a long, long time ago in England, they used to store the pork shoulder in barrels that they called butts, hence the name pork butt!
 The pork was on the grill from 7:30 in the morning until about 3:00 in the afternoon. I wish I could tell you what kind of rub was put on it, but I am not sure about the specifics. While Jeff took care of the pork, Sarah had a beautiful spread inside that consisted of cheese and crackers, homemade dill dip with shredded cucumber, chips and salsa, delicious hummus and this interesting spicy onion-type dip for chips.
I then took on the role of sous chef and helped make some sauces while Sarah and others pulled the pork apart. There was a LOT of pork, let me tell you. The sauces Jeff made were delicious. One in particular was a mustard sauce with brown sugar, vinegar, hot sauce and a few special ingredients. It was finger-lickin good! Along with the pork, Sarah served my butternut squash side, baked ziti, couscous salad and ceaser salad. Everything was so tasty - I almost didn't have enough room for dessert.

For dessert, Sarah had homemade cupcakes! She made strawberry with vanilla frosting, and lemon with lemon cupcakes. Then, there was tiramisu that our friend Jennie made and that went really quick, brownies, chocolate cookies with white chocolate chips and these apple crunch bars.
After eating tooooo much food, we sang Jean happy birthday while she sat emotionless (it was priceless). She dove into a strawberry cupcake, opened her gifts, and if I can put words in her mouth, I think she had a darn good time.
Thank you Jeff and Sarah for hosting such a lovely party! It was a great time had by all!!!

Sunday, August 29, 2010
Squash It!
Justin and I are going to our friends Jeff and Sarah's today for their daughters 1st birthday party. It feels like just yesterday when we found out Jean was born! Anyway, they are hosting a party at their house this afternoon for about 40 friends and family.
My mom always told me that I should never show up anywhere empty handed, so I called Sarah to ask her what I should bring to the party. She told me that she had these two HUGE butternut squash that she needed to do something with.
Now, our other friend Jennie makes this awesome butternut squash side dish that Sarah and I always drool over, so Sarah asked if I could try and make it. I tried it once before and failed miserably, so I had Justin get me the recipe so I could make it right this time.
I wish I had a video of me hacking away at the squash with a butcher knife because it was pretty hilarious. I sort of winged this recipe, but I will try and lay it out as best as I can.
Ingredients:
2 butternut squash
1 1/2 C. crumbled blue cheese
1 C. chopped walnuts
3 tbsp. honey
1/4 tsp. cinnamon
evoo (drizzles- no exact measurement)
salt and pepper (to taste)
Steps:
 Cut the squash lengthwise and scoop out the seeds in the middle. Then, peel the squash (you can use a regular peeler) and make sure NO skin is left on.
Once the squash is peeled and de-seeded, cut it into 1 inch cubes and place in a microwave safe dish. Microwave for several minutes (I did 3 minutes, mixed it around and did another 3) - do this until the squash is almost soft enough to eat.
 Then, spread the squash cubes on a cookie sheet, drizzle with evoo and bake at 350 for 15-20 minutes.
Remove the squash from the oven, place in a bowl and refrigerate for about an hour (or longer if you are making this ahead of time). It is important to let the squash cool so that it doesn't melt the cheese when it is mixed in.
After the squash is cool, mix in blue cheese, walnuts, honey, cinnamon salt and pepper. Stir so that everything gets coated and serve!

My mom always told me that I should never show up anywhere empty handed, so I called Sarah to ask her what I should bring to the party. She told me that she had these two HUGE butternut squash that she needed to do something with.
Now, our other friend Jennie makes this awesome butternut squash side dish that Sarah and I always drool over, so Sarah asked if I could try and make it. I tried it once before and failed miserably, so I had Justin get me the recipe so I could make it right this time.
I wish I had a video of me hacking away at the squash with a butcher knife because it was pretty hilarious. I sort of winged this recipe, but I will try and lay it out as best as I can.
Ingredients:
2 butternut squash
1 1/2 C. crumbled blue cheese
1 C. chopped walnuts
3 tbsp. honey
1/4 tsp. cinnamon
evoo (drizzles- no exact measurement)
salt and pepper (to taste)
Steps:

Once the squash is peeled and de-seeded, cut it into 1 inch cubes and place in a microwave safe dish. Microwave for several minutes (I did 3 minutes, mixed it around and did another 3) - do this until the squash is almost soft enough to eat.

Remove the squash from the oven, place in a bowl and refrigerate for about an hour (or longer if you are making this ahead of time). It is important to let the squash cool so that it doesn't melt the cheese when it is mixed in.
After the squash is cool, mix in blue cheese, walnuts, honey, cinnamon salt and pepper. Stir so that everything gets coated and serve!

Tips: This is a great side dish that goes with ANYTHING! Blue cheese and honey are very complimentary to each other. Also, the crunch of the walnuts along with the soft squash is another great combo.
You will definitely need a fair chunk of time to make this dish but you can definitely make this a few days ahead. I recommend making the squash ahead, and then just mixing the remaining ingredients right before you serve. The hardest part is the peeling and cubing of the squash so once you get that out of the way, it's a breeze.
Also, I know blue cheese can be an acquired taste, but this would also taste good with crumble Gorgonzola or even goat cheese.
I hope it's a hit at the party! Wish me luck!
Table for 9
Last night I hosted my very first dinner party! This was something that I have wanted to do for a while, but it was a matter of getting all my stuff together and mustering up the courage to actually cook for a lot of people.
In total (including me) there were 9 around the table - well not exactly around the table, a few had to sit on the couch because I couldn't find a spare table, but regardless, I was cooking for 9. All day I kept running over the time in my head. I called it for 6:30, which meant I wanted the appetizers to be done by then, so I had to put the pigs in a blanket in at 6:15, etc... You get the picture. I'm a planner, what can I say.
Other than the fact that the pilot light in my oven went out around 6:00 (I got it fixed within 10 minutes), everything went off without a glitch.

The menu was as follows:
Appetizers:
Pigs-in-a-blanket (with ketchup and mustard dip)
Shrimp cocktail (with homemade cocktail sauce)


Tomato-mozzarella-basil skewers
Main Course:
Red wine marinated sirloin steaks (about 3 lbs)
Garlic mashed potatoes
Sauteed string beans with garlic
Dessert:
Blueberry peach cobbler with vanilla frozen yogurt.
If I do say so myself, everything was delicious. The appetizers kept people busy while I finished everything up in the kitchen. The company was fabulous, I must say I have great friends!
Everyone helped me clean up, which was fabulous considering I am a little anal when it comes to cleaning.
Looking back on it now, I think it last night was a success. We enjoyed some drinks, good talks, delicious food - what else could a girl ask for?
Thanks to Jay, Jess, Whitney, Steve, Amber, Michelle, Sperry and Justin for coming! Hope everyone enjoyed.
And in the words of Dave Matthews
Turns out not where, but who you're with that really matters...
Saturday, August 28, 2010
Stop...Gnocchi Time
When I was in New York a few weekends ago, we went to an Italian market, and I couldn't resist purchasing some spinach gnocchi to take back with me.
 Last night for dinner, I made this delicious spinach gnocchi for Justin and I since we decided to have a lay-low evening. After talking to my boss Jen and finally nailing down the pronunciation of this delicious dumpling (pronounced more like nyo-key NOT knock-ey), I decided to serve this up with a plain tomato sauce as opposed to a meat sauce. Since the gnocchi is so dense, this was a smart decision.
 The great thing about gnocchi is that it is super easy to tell when it is done. Unlike other pasta, where many people resort to throwing it against the wall, gnocchi rises to the top of the pot when it is all done and ready to serve.
 Justin sliced up some tomatoes that his parents gave them from their garden and tossed them with some shredded mozzarella, salt and pepper. These tomatoes are hands down better than any tomato you can get at a super market- trust me.
Once that was done, we plated it all, made a toast to a lovely Friday evening and ate away!
Good thing we laid low too because I have about 9845948593 things to do for my fabulous dinner party tonight. Lots of prep, lots of cooking and lots of pictures, so keep checking back for that post :)


Once that was done, we plated it all, made a toast to a lovely Friday evening and ate away!
Good thing we laid low too because I have about 9845948593 things to do for my fabulous dinner party tonight. Lots of prep, lots of cooking and lots of pictures, so keep checking back for that post :)

Friday, August 27, 2010
All Bow-Tied Up
I don't usually eat pasta too much, but this is one of my most favorite recipes to turn to when I am in a pasta mood. The combination of all the ingredients in this recipe makes for a delicious dish that not only makes the taste buds happy, but is super easy to make!
Ingredients:
6 ounces uncooked farfalle (bow tie pasta)
2 C. grape tomatoes, halved
1 C. seedless green grapes, halved
2 tsp. white balsamic vinegar
2 tsp. chopped shallots
2 tsp. capers
1 tsp. Dijon mustard
½ tsp. minced garlic
2 tsp. evoo
1 package crumbled reduced-fat feta cheese
salt and pepper to taste
Steps:
Cook pasta according to package directions; Drain.
While pasta cooks, combine vinegar, shallots, capers, dijon mustard, garlic, and s&p in a small bowl, stirring with a whisk. Gradually add oil to vinegar mixture, stirring constantly with a whisk.
Combine cooked pasta, tomatoes, and grapes in a large bowl.
Drizzle vinaigrette over pasta mixture; toss well to coat. Add cheese; toss to combine.
 *
*
Tips:
I personally can't taste a difference between white and normal balsamic vinegar, so I would say go ahead and use whatever you have on hand.
The flavors of the feta and grape together are so delicious, and then mixed with a little tart from the balsamic vinegar- this recipe is perfection to me!
Feel free to cut out the evoo if you are trying to cut calories- it does add flavor, but eliminating it won't take away from the deliciousness of the dish. Also, adjust the pasta according to how many people you are trying to serve. I always make it all and take the leftovers to work for lunch.
Lastly, if you're looking for a side, this pasta is good served with pan-grilled asparagus.
*Recipe and photo from cookinglight.com
Bow Ties with Tomatoes, Feta and Balsamic Dressing
Ingredients:
6 ounces uncooked farfalle (bow tie pasta)
2 C. grape tomatoes, halved
1 C. seedless green grapes, halved
2 tsp. white balsamic vinegar
2 tsp. chopped shallots
2 tsp. capers
1 tsp. Dijon mustard
½ tsp. minced garlic
2 tsp. evoo
1 package crumbled reduced-fat feta cheese
salt and pepper to taste
Steps:
Cook pasta according to package directions; Drain.
While pasta cooks, combine vinegar, shallots, capers, dijon mustard, garlic, and s&p in a small bowl, stirring with a whisk. Gradually add oil to vinegar mixture, stirring constantly with a whisk.
Combine cooked pasta, tomatoes, and grapes in a large bowl.
Drizzle vinaigrette over pasta mixture; toss well to coat. Add cheese; toss to combine.
 *
*Tips:
I personally can't taste a difference between white and normal balsamic vinegar, so I would say go ahead and use whatever you have on hand.
The flavors of the feta and grape together are so delicious, and then mixed with a little tart from the balsamic vinegar- this recipe is perfection to me!
Feel free to cut out the evoo if you are trying to cut calories- it does add flavor, but eliminating it won't take away from the deliciousness of the dish. Also, adjust the pasta according to how many people you are trying to serve. I always make it all and take the leftovers to work for lunch.
Lastly, if you're looking for a side, this pasta is good served with pan-grilled asparagus.
*Recipe and photo from cookinglight.com
Monday, August 23, 2010
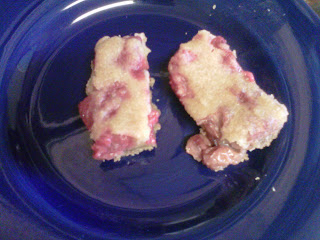
Very Cherry Berry Good
Lazy Sundays are the best days for baking. Yesterday, after I went to the grocery store I had a few hours to kill before Justin and I met up with some friends to eat crabs, so I browsed some recipes and came across one for...
Cherry Brown Butter Bars
They were actually a lot of easier than I expected, and don't have too many ingredients that aren't normalliny in your pantry - well that's if you keep your pantry stocked like mine.
Ingredients:
1/4 tsp. vanilla extract
1 C and 1 tbsp. whole wheat flour
Pinch of salt
Filling
1/2 C. splenda
1 self-serve size container of unsweetened apple sauce
Pinch of salt
1/4 C whole wheat flour
1 tsp. vanilla extract
1/2 cup (1 stick) unsalted butter, diced
Berries of choice - I used half a can of pitted cherries and a small container of raspberries
Steps:
Cherry Brown Butter Bars
They were actually a lot of easier than I expected, and don't have too many ingredients that aren't normalliny in your pantry - well that's if you keep your pantry stocked like mine.
Ingredients:
Dough
7 tablespoons unsalted butter, melted
1/3 C splenda1/4 tsp. vanilla extract
1 C and 1 tbsp. whole wheat flour
Pinch of salt
Filling
1/2 C. splenda
1 self-serve size container of unsweetened apple sauce
Pinch of salt
1/4 C whole wheat flour
1 tsp. vanilla extract
1/2 cup (1 stick) unsalted butter, diced
Berries of choice - I used half a can of pitted cherries and a small container of raspberries
Steps:
 |
| Dough Mixture |
Pre-heat oven to 375
Line an 8×8-inch square baking pan with parchment paper. Make sure the entire surface is covered.
For dough: Mix melted butter, splenda and vanilla in medium bowl. Add flour and salt and stir until incorporated. Transfer dough to your prepared pan, and use fingertips to press the dough evenly across the bottom of the pan. Bake the crust until golden, about 18 minutes. Remove the dough and cool in pan while you make the filling.
 |
| Dough in pan |
For filling: Cook butter in heavy small saucepan over medium heat until deep nutty brown (do not burn), stirring often and watching carefully, about six minutes. Immediately pour browned butter into glass cup to cool slightly.
Whisk splenda, applesauce, and salt in medium bowl to blend. Add flour and vanilla and whisk until smooth. Gradually whisk browned butter into filling mixture; whisk until well blended.
 |
| Arrange fruit |
Arrange fruit in bottom of cooled crust. Carefully pour browned butter mixture evenly over the fruit. Bake bars until filling is puffed a toothpick inserted into center comes out clean, about 40 minutes. Cool bars completely in pan on rack.
Use the parchment paper overhang to carefully remove cooled bars from pan and place them on a cutting board and cut them into squares with a very sharp knife.
 |
Pour filling over fruit |
Tips: Make sure when you are pressing the dough that there are no cracks- this will make it easier when you are cutting the bars.
When you are pouring the filling over the fruit, make sure you are spreading it evenly. Mine seemed to gather mostly in the middle, so I had to use my fingers and try and push the filling around so that it was even.
Lastly, you can use any fruit that you would like in these, but I would definitely recommend something tart. Cherries and raspberries both tasted delicious. I would be interested in strawberry bars, but I guess I will have to wait and make those another time after these are all eaten!

Sunday, August 22, 2010
Brasserie Beck
Last night, Justin, Alex, Shana and I went out for a night on the town. Not really a night on the town, but a really great dinner in D.C.

 Brasserie Beck is located on 11th St. and K in Northwest D.C. They describe themselves as a "European style brasserie." Their menu has great seafood options (try the lobster), flavorful starter options such as shallot and onion soup or braised pork belly with rice beans, and a entree selection where everyone will be able to find something to eat.
Justin and I were planning to have a date night and we invited Alex and Shayna to come with. Alex, who co-owns 207 Lobster, a lobster distribution company in Washington D.C. suggested that we go to Brasserie Beck since they are one of his clients. We all agreed, put on our Saturday night best, and headed into D.C.

 Brasserie Beck is located on 11th St. and K in Northwest D.C. They describe themselves as a "European style brasserie." Their menu has great seafood options (try the lobster), flavorful starter options such as shallot and onion soup or braised pork belly with rice beans, and a entree selection where everyone will be able to find something to eat.
We started our evening with a bottle of 2008 Sauvignon Blanc from New Zealand. It was a very crisp wine that was extremely refreshing after a day out tubing on the river. We then ordered a round of mussels for the table that came in a white wine/cream sauce with parsley. They also came with Belgian frites which were some of the most delicious fries I have ever eaten (take that McDonalds!)
We noshed on some delicious bread that is actually flown in from France and looked over the menu one last time before making our decisions. Then we each ordered a different dish so we could maximize what we got to taste. All together we ordered the bistro fillet with green peppercorns and cognac sauce, grilled trout in lemon caper sauce, roasted duck and a pork shank. The waiter was also kind enough to put in side orders for us and we had spinach sauteed in evoo and garlic, gratin of cauliflower and potatoes au gratin.
 |
| Gratin Cauliflower |
Everything that we ate was absolutely fabulous and cooked to perfection. The trout was brought to the table whole where they proceeded to clean it and place it in front of me so I could dive in. It was served on top of an heirloom tomato salad that was delicious. The bistro fillet was cooked perfectly and the cognac sauce served as a great, rich little dipping sauce if one was so inclined. The pork shank fell of the bone and was very tender and moist. The duck, which I am sometimes hesitant of, also tasted great and wasn't as fatty as other duck I have had.
 |
| Cleaning the fish |
We rounded out the evening with a beer float, raspberry creme brulee and the Belgian waffle du jour (which came with some cooked apples, scoop of vanilla ice cream and some whipped cream.) We took a tour of the kitchen, thanked Chef John for a delicious meal, and went on our merry way. Many thanks to everyone at Brasserie Beck who treated us like kings and queens and served up such a delicious meal!!!
PS- sorry if the pictures aren't the best quality, I took them on my phone and was snapping them pretty quick so I didn't interrupt anyones eating.
Prosciutto Wrapped Love
On Saturday we went tubing, and Justin and I had plans to go out for dinner with some friends later that evening. Once we got done tubing and made it home, the time we had to get showered and ready was running tight, and I really wanted to enjoy a nice appetizer and glass of wine with Justin. T - 80 minutes.
After sorting through my mental catalogue of recipes I remembered reading about prosciutto wrapped melon, and I figured that would be easy enough. I stopped at Sniders, the little market by my apartment. They didn't have all cantaloupe, so I bought a fruit salad and figured that would have to do. I then got 3 slices of prosciutto sliced thin at the meat counter and went on my way.
Ingredients:
3 thin slices of prosciutto
melon - cantaloupe and honey dew
toothpicks
Steps:
Using a melon-baller, scoop of small melon balls and place on a platter
 Place the prosciutto in a pan on medium heat. Wait for it to crisp up and flip - about 3 minutes each side.
Remove prosciutto from heat and cut into squares/rectangles.
Place prosciutto on top of melon, place toothpick in the center and ta-da! You have a delicious appetizer.


After sorting through my mental catalogue of recipes I remembered reading about prosciutto wrapped melon, and I figured that would be easy enough. I stopped at Sniders, the little market by my apartment. They didn't have all cantaloupe, so I bought a fruit salad and figured that would have to do. I then got 3 slices of prosciutto sliced thin at the meat counter and went on my way.
Ingredients:
3 thin slices of prosciutto
melon - cantaloupe and honey dew
toothpicks
Steps:
Using a melon-baller, scoop of small melon balls and place on a platter

Remove prosciutto from heat and cut into squares/rectangles.
Place prosciutto on top of melon, place toothpick in the center and ta-da! You have a delicious appetizer.

Tips: The salty and sweet combination of this appetizer is great. Make sure that the melon is fresh and ripe or else the flavors don't blend as well.
I served this up with some merlot and Justin and I shared some peace and quiet before dinner. Cheers!

Friday, August 20, 2010
...Like a Big Pizza Pie!
 Well, not a big pizza pie, but more like a single serving pizza pie.
I was craving pizza last night and as I stood there for 15 minutes with the fridge open thinking how I was going to make pizza with very few groceries left over from this weeks shopping trip, I thought "TORTILLA!"
Yup, I made a pizza on a tomato basil tortilla. I absolutely LOVE La Tortilla Factory tortillas. There are so many varieties of these tortillas, and most of them clock in at 1 weight watcher points. They are great for wraps, quesadillas and yes, pizza.
I gathered up some fresh tomatoes that we had picked from Justin's parents garden, sliced them up and made this fabulous tasting (and looking) pizza shown below all for about 5 ww points*.
Ingredients:
1 tomato basil softwrap
1 tsp. evoo
tomato slices
1/4 cup reduced fat mozzarella cheese
4-5 basil leaves
garlic to taste
Steps:
Coat pan with non-stick spray.
Place tortilla in pan and spread evoo and garlic across it. Place sliced tomato and basil evenly across the tortilla. Top with cheese.
Heat pan on medium heat and cook until cheese is melted. Serve and eat!

Tips:
The best thing about making a personal pizza like this is that you can top it however you like. If you want to put tomato sauce on instead of evoo, go ahead! Throw some mushrooms on there! Load it with veggies! Do whatever you like - it will still be delicious.
This meal is also great for kids because it's so quick and easy. Just put the tortilla in the pan and tell them to load it up with whatever they like!
I calculated this to have about 5 ww points*, 1 for the tortilla, 2 for the cheese and 2 for the evoo (this could even be omitted if you so desired.) Serve with a side salad and you have a healthy, hearty meal.
Thursday, August 19, 2010
Millions of Peaches...Peaches for Me!

Let me tell you, these make such a great dessert, and they are so easy to make.
I won't bore you with any witty jokes and small talk, because once you see this recipe you'll head straight for the grill and make this fantastic dessert.
Ingredients:
1 peach
1 small container light-and-fit fat free vanilla yogurt
1 tbsp honey
cinnamon to taste
Steps:
Spray grill pan (or grill) and heat to medium
Cut peach in half, discard core and place peaches on grill pan and cook 3-4 minutes on each side
While peaches are cooking, mix yogurt, honey and cinnamon.
Remove peaches, scoop yogurt mixture into the center of each peach. Serve and eat!

I served this up with a scoop of vanilla frozen yogurt, but its up to you! This is about 3 ww points*
Asian (not-so) Glazed Chicken
One of my most favorite blogs to read is Gina's Weight Watcher recipes. She has such great pictures and the recipes all sound so delicious. While browsing her site, I came across a recipe for Asian-style glazed drumsticks that I HAD to make.
So last night, I went digging around in my kitchen and took out the necessary supplies. Unfortunately I didn't have drumsticks, so I went with a chicken tender I had in the fridge (3 oz. already weighed out so I knew how many ww points* it was).
The recipe below is for a single serving, but it can definitely be tailored for a larger group of people. It really is an easy dish to make and it is packed with TONS of flavor!
Ingredients:
3 oz. chicken breast/tender
2 packets splenda
3 tbsp. water
5. tbsp. low-sodium soy sauce
5. tbsp balsamic vinegar
1 clove garlic
1-2 tbsp. siracha (be careful this stuff is H-O-T- HOT!)
1 bunch broccoli
chives or scallions
sesame seeds
Steps:
Brown chicken on high for 3-4 minutes with a little spray oil.
Add broccoli, water, balsamic, soy sauce, splenda, garlic, hot sauce and cook on high until liquid comes to a boil. Reduce heat to low and simmer, covered for about 20 minutes.
Remove cover and bring heat to high, allowing sauce to reduce down, about 8 minutes until it becomes a thick glaze, turning chicken occasionally.
Top with chives and sesame seeds and serve.
Tips:
Be careful once you remove the lid and watch the glaze as it is reducing to make sure it doesn't burn.
As you can see from my picture, I didn't actually perfect the glaze. The fact of the matter was, after running 5 miles at the gym and starting the cook, the thought of waiting 28 minutes for this sauce to glaze was just too much to handle. It still tasted FABULOUS! And the next time I make this dish, I will make sure I have the patience to cook it accordingly.
I served this up with a chicken/veggie potsticker because I was making them for lunch the next day and it just fit so perfectly into this meal. I also threw in a few pineapple chunks I had left over from my cranberry muffins and it complimented the flavor well.
Besides the chicken (which was 3 ww points*) all the other ingredients in this dish were relatively pointless (well not POINTLESS, but you know what I mean). So let's round it up to 4 just to be safe...not too shabby for a simple, tasty meal!
Lastly, to see Gina's recipe on this, go to: http://www.skinnytaste.com/2010/07/asian-glazed-drumsticks.html
So last night, I went digging around in my kitchen and took out the necessary supplies. Unfortunately I didn't have drumsticks, so I went with a chicken tender I had in the fridge (3 oz. already weighed out so I knew how many ww points* it was).
The recipe below is for a single serving, but it can definitely be tailored for a larger group of people. It really is an easy dish to make and it is packed with TONS of flavor!
Ingredients:
3 oz. chicken breast/tender
2 packets splenda
3 tbsp. water
5. tbsp. low-sodium soy sauce
5. tbsp balsamic vinegar
1 clove garlic
1-2 tbsp. siracha (be careful this stuff is H-O-T- HOT!)
1 bunch broccoli
chives or scallions
sesame seeds
Steps:
Brown chicken on high for 3-4 minutes with a little spray oil.
Add broccoli, water, balsamic, soy sauce, splenda, garlic, hot sauce and cook on high until liquid comes to a boil. Reduce heat to low and simmer, covered for about 20 minutes.
 |
| Asian Glazed Chicken with Broccoli and Potsticker |
Top with chives and sesame seeds and serve.
Tips:
Be careful once you remove the lid and watch the glaze as it is reducing to make sure it doesn't burn.
As you can see from my picture, I didn't actually perfect the glaze. The fact of the matter was, after running 5 miles at the gym and starting the cook, the thought of waiting 28 minutes for this sauce to glaze was just too much to handle. It still tasted FABULOUS! And the next time I make this dish, I will make sure I have the patience to cook it accordingly.
I served this up with a chicken/veggie potsticker because I was making them for lunch the next day and it just fit so perfectly into this meal. I also threw in a few pineapple chunks I had left over from my cranberry muffins and it complimented the flavor well.
Besides the chicken (which was 3 ww points*) all the other ingredients in this dish were relatively pointless (well not POINTLESS, but you know what I mean). So let's round it up to 4 just to be safe...not too shabby for a simple, tasty meal!
Lastly, to see Gina's recipe on this, go to: http://www.skinnytaste.com/2010/07/asian-glazed-drumsticks.html
Wednesday, August 18, 2010
Cool-as-a-Cucumber Salad!
Inspired by one of my favorite dips (dill dip), I made this cucumber side salad today when I got home from the gym to snack on while I contemplate what to make for dinner.
I sort of just threw some stuff together, but I will try and map it out as best as possible.
1 seedless cucumber, halved and sliced
3 tbsp. fat free sour cream (or greek yogurt, depending on what you have on hand)
lemon juice (about half a lemon)
1 -2 tbsp. dill
1-2 tbsp. dried minced onion
Steps:
Combine and eat! (or chill if you are serving later)
 Tips:
Tips:
For weight watchers points*, I would say 1 for the sour cream, and that's about it. Cucs are 0 points and the fat free sour cream is about 20 calories per tablespoon - depending on the brand you buy.
This is a great side dish when grilling or eating outside since it is super cool, and the sour cream/dill flavor really compliments the flavor of grilled meat!
I sort of just threw some stuff together, but I will try and map it out as best as possible.
Cool-as-a-Cucumber Salad
Ingredients:1 seedless cucumber, halved and sliced
3 tbsp. fat free sour cream (or greek yogurt, depending on what you have on hand)
lemon juice (about half a lemon)
1 -2 tbsp. dill
1-2 tbsp. dried minced onion
Steps:
Combine and eat! (or chill if you are serving later)

For weight watchers points*, I would say 1 for the sour cream, and that's about it. Cucs are 0 points and the fat free sour cream is about 20 calories per tablespoon - depending on the brand you buy.
This is a great side dish when grilling or eating outside since it is super cool, and the sour cream/dill flavor really compliments the flavor of grilled meat!
Say Cheese!
So when I was in New York City, my friends and I made a whole variety of food. We wanted a bunch of things that we could pick at, and since I knew we were having wine, my mind automatically went to cheese.
One of my most favorite and easiest cheese appetizers to make is a baked brie. I think everyone has their own way of making theirs, but I learned this recipe from one of my mom's friends who always makes a baked brie for the holidays.
Ingredients:
1 wheel brie cheese
1 can reduced-fat crescent rolls
1 jar sugar-free apricot preserves
Steps:
Preheat oven at 350
Unroll dough on a flat surface and cut in half.
Spread apricot preserves on both pieces of dough. Set one aside and place the other on a greased cookie sheet or in a greased pan.
 Place the brie on top of the preserves, then take the other square of dough and place preserve-side down on top of the cheese. Seal the two pieces of dough together.
Serve warm with crackers!
Tips:
You can make this with any flavor preserves - I am interested in trying it with cranberries or pomegranate. Also, I have seen several recipes that use nuts as well. And I am definitely going to play around with cutting the dough, making designs, etc. to spice it up a little (well at least visually)
One of my most favorite and easiest cheese appetizers to make is a baked brie. I think everyone has their own way of making theirs, but I learned this recipe from one of my mom's friends who always makes a baked brie for the holidays.
Ingredients:
1 wheel brie cheese
1 can reduced-fat crescent rolls
1 jar sugar-free apricot preserves
Steps:
Preheat oven at 350
Unroll dough on a flat surface and cut in half.
Spread apricot preserves on both pieces of dough. Set one aside and place the other on a greased cookie sheet or in a greased pan.
Place the brie on top of the preserves, then take the other square of dough and place preserve-side down on top of the cheese. Seal the two pieces of dough together.Bake until the dough is golden brown - about 20 - 25 minutes.
Tips:
You can make this with any flavor preserves - I am interested in trying it with cranberries or pomegranate. Also, I have seen several recipes that use nuts as well. And I am definitely going to play around with cutting the dough, making designs, etc. to spice it up a little (well at least visually)
Learn the Way Young Jedi
Well, I have to admit, it's been a while since Yahoo! inspired a post for me, but I came across this article "Cooking for Dummies: What to Cook if You Never Cook" and I thought this was a worthy article to appear on such a prestigious blog (I kid).
But I realize that everyone who reads may not be an experienced chef ... I am far from professional but I have been honing in on my skills for some time now. Below are some tips that the article offers up for new wannabe cooks and then I decided to throw in my two cents at the end as well.
Reason 1: You don’t like to cook.
Solution: Make Smoky Ham & Corn Salad. If you want to start off really slowly, try a recipe that doesn’t actually involve any cooking at all. You’re just pulling a few ingredients together in bowl and wham! There’s a mouthwatering dinner on the table without even turning on your stove.
Cuisine Queen: My recommendation here is to think back to dishes you absolutely LOVED when you were growing up. Wouldn't you want to have that again? That alone is enough to get me cooking. But if you can't think of anything, this is definitely a good tip. Things like Israeli salad, three bean salads, and other no-cook recipes are definitely a great way to get that first foot in the kitchen.
Reason 2: You’re intimidated.
Solution: Make Whole-Roasted Lemon Herb Chicken on a Bed of Vegetables. Roasting a whole bird for beginners??? Yup. Try this one if you’re stuck entertaining a few folks and you’re feeling intimidated. This recipe doesn’t involve anything fancy. Just cut up some vegetables, make a rub for the chicken, and throw it all in the pan as is. No fancy tucking or tying the wings or legs. And the flavor is phenomenal.
Cuisine Queen: This is definitely an easy solution. It is easy to cook a whole chicken - just give it a nice rub and your done. Other super easy ideas that don't require too much skill are meat loafs, pork chops, or 1 dish bakes like a chicken potato bake. The less ingredients/dishes, the better when you are feeling a little cooking-fright.
Reason 3: It’s too complicated.
Solution: 5-Spice Tilapia. If you never cook, maybe you’re afraid of the never-ending pile of ingredients on your kitchen counter. If that’s the case, try a 5-ingredient dinner like this one. Full-flavored, with only 5 ingredients. How simple is that?
Cuisine Queen: Agreed! This relates to the above reason as well. Good solutions here are foil packets - just take some foul, throw in whatever it is your cooking (protein,veggies, potatoes and all) and put it in the over or the grill and viola! Done.
Reason 4: You’re afraid of ruining the meal.
Solution: Are you afraid of overcooking something? Or actually burning something because you left it in the oven or on the stove and forgot it was there? Invest in a slow cooker. It’s a fool proof way to whip up delicious meals like BBQ Pulled Chicken with little effort. Many slow cookers have a mechanism that switches to a warm setting, so even if you do get distracted dinner will make it to the table unscathed.
Cuisine Queen: Slow cookers are amazing and definitely prevent the ruining of the meal. But you can't slow cook things all the time, so in my opinion, face your fear. Get together with a friend (they can either be experienced or inexperienced) and cook together, that way if the meal is ruined, you and your friend can laugh about it later, clean up the dishes while you wait for delivery and give it a shot another time.
Reason 5: You don’t have enough time.
Solution: If you never cook because you don’t think you have enough time, try this delicious Black Bean Quesadilla . Yes, it is possible to have an ooey-gooey dinner in only 15 minutes—about the same amount of time it would take you to order a sandwich or pizza at the local takeout place.
Cuisine Queen: Even as someone who cooks regularly, I still use quesdillas as a go-to when I am pressed for time. I also make quesadillas when I have some stuff in the fridge that i need to get rid of before going bad. They are sort of an anything-goes meal because let's be honest - what doesn't taste good in a tortilla surrounded by melted cheese. Another quick and easy meal is to make a pan-pizza. Simply take a tortilla, cover it with sauce, cheese and whatever toppings, plop it in a sprayed pan and cook until the cheese melts.
Simple and easy, eh?
To read to the full article (with recipes), go to: http://shine.yahoo.com/channel/food/cooking-for-dummies-what-to-cook-if-you-never-cook-2329356/
Tuesday, August 17, 2010
Do You Know the Muffin Man?

In my quest for a delicious, easy, grab-and-go breakfast food, I came across a lightened up cranberry muffin recipe. And then I did something unimaginable ... I lightened it up even more!
By substituting a few ingredients, I believe I managed to make the most scrumptious, low cal, low ww point breakfast muffin.
No-More-Muffin-Top Cranberry Muffins
Ingredients:1 1/4 C whole wheat flour
1/2 C uncooked old fasioned oats
1/4 C splenda
1 1/4 tsp. baking powder
1/4 tsp. baking soda
1 C fat-free vanilla yogurt (I used 2 light and fit 60 calorie cartons)
1/4 C skim milk
1 serving of applesauce
1 tbsp. 0 calorie spray butter
1/2 tsp. vanilla extract
1/4 tsp. salt
1/2 C dried cranberries
1/4 C crushed pineapple (in juice)
Zest of 1 orange
Steps:
Preheat oven to 400 degrees
Spray a 12-cup muffin pan with cooking spray.
Combine flour, oats, sugar, baking powder, baking soda, orange zest and salt in a large bowl; mix well with a fork, make a well in the centre and set aside.
Whisk together yogurt, milk, applesauce, spray butter, pineapple and vanilla in a small bowl. Fold mixture into dry ingredients until blended; fold in cranberries. Spoon batter into prepared pan, filling each cup about 2/3 full.
Bake for 20 minutes or until inserted in center of a muffin comes out clean,. Allow to cool in pan on a wire rack for 10 minutes and eat!

It seems like a lot of ingredients, but I promise you, these are super easy.
I recommend using unsweetened applesauce as a egg substitute, but if you wanted to use eggs, or an egg substitute it only needs about 2 tbsp. egg substitute (about 1 egg). Eggs are super easy to replace in baking recipes because they act as a binder, so replacing them doesn't take away much from the flavor.
Also, be careful when substituting sugar with a 0 calorie sweetener because they tend to be sweeter than sugar when giving the same amount.
As far as calories are concerned per muffin, I tried to do some basic calculations and I estimate about 500 calories for the flour, 120 for the yogurt, 60 for the milk, 50 for the applesauce, a combined 120 for the cranberries and pineapple and 150 for the oats. That's a total of 1000 calories. Divide that by 12, and you only have 84 calories per muffin, around 1 gram of fat and it definitely has some fiber. Not bad if I do say so myself!
Monday, August 16, 2010
Blueberry Peach Heaven
I love to watch the food network. I especially like watching the food network before I am about to make dinner since watching other people make food revs up my appetite.
A few weeks ago while watch the food network, I witnessed Paula Deen making the most amazing and simple looking dutch oven blueberry peach cobbler. Now, I must admit I don't usually end up making all these masterpieces I see on TV, but this looked too delicious to pass up.
So the other night, after eating a small meal (chicken legs on the grill pan with some coleslaw), I made Paula Deen's dutch oven blueberry peach cobbler, and not to brag, but I did a GREAT job and it was sooooooo tasty.
Ingredients:
2-16 oz cans sliced peaches in syrup
1 pint fresh blueberries
1/2 C baking mix (Bisquick)
1/3 C sugar
ground cinnamon
Topping:
2-1/4 C baking mix
1/4 C sugar
1/4 C butter, melted
1/2 C milk (I used skim)
Cinnamon and sugar
Steps:
Preheat oven to 350
Drain one can of peaches, and then combine drained peaches, 1 can peaches and syrup, blueberries, Bisquick, sugar and cinnamon and place in a greased dutch oven or pie pan.
To make the topping, combine Bisquick, butter, sugar and milk and mix until it forms into a dough like consistency. Using a spoon and your finger, drop scoops of topping over the peach/blueberry mixture. Sprinkle with cinnamon and sugar.
Bake at 350 for 45 minutes, or until top is golden brown.
Tips: Don't be shy with the cinnamon-sugar topping. Also, next time I make this I am going to substitute the sugar for splenda and see how that turns out.
Also, I served this with a nice scoop of vanilla frozen yogurt and it really hit the spot!
A few weeks ago while watch the food network, I witnessed Paula Deen making the most amazing and simple looking dutch oven blueberry peach cobbler. Now, I must admit I don't usually end up making all these masterpieces I see on TV, but this looked too delicious to pass up.
So the other night, after eating a small meal (chicken legs on the grill pan with some coleslaw), I made Paula Deen's dutch oven blueberry peach cobbler, and not to brag, but I did a GREAT job and it was sooooooo tasty.
Ingredients:
2-16 oz cans sliced peaches in syrup
1 pint fresh blueberries
1/2 C baking mix (Bisquick)
1/3 C sugar
ground cinnamon
Topping:
2-1/4 C baking mix
1/4 C sugar
1/4 C butter, melted
1/2 C milk (I used skim)
Cinnamon and sugar
Steps:
Preheat oven to 350
Drain one can of peaches, and then combine drained peaches, 1 can peaches and syrup, blueberries, Bisquick, sugar and cinnamon and place in a greased dutch oven or pie pan.
 |
| Cobbler with topping, before baking |
Bake at 350 for 45 minutes, or until top is golden brown.
Tips: Don't be shy with the cinnamon-sugar topping. Also, next time I make this I am going to substitute the sugar for splenda and see how that turns out.
Also, I served this with a nice scoop of vanilla frozen yogurt and it really hit the spot!
 |
| Blueberry Peach Cobbler |
Subscribe to:
Posts (Atom)